Setting up the Environment
This procedure will show how to prepare your system for uploading the firmware to your tracker.
1. Install Visual Studio Code
Download the latest Visual Studio Code and install it.
2. Install PlatformIO IDE
Once Visual Studio Code is installed, open it and install PlatformIO IDE for VSCode, an extension that will allow you to connect to the tracker, build and upload the firmware.
3. Install Device Drivers
Please note: these drivers will be automatically installed if you download and run the SlimeVR server.
For CH340 (NodeMCU v3, Wemos D1 Mini, and official SlimeVR trackers)
Download the CH341SER.EXE file from here, run it and follow installation instructions.
For CP210X (NodeMCU v2)
-
Download the zip archive with the drivers from silicon labs here.
For any other OS, the drivers can be found here.
-
Extract the files from the downloaded zip archive, then launch
CP210xVCPInstaller_x64.exe(CP210xVCPInstaller_x86.exeif you are using 32-bit Windows) and follow installation instructions.
4. Install Git Client
For Windows, you can download and install Git for Windows. If you have other OS, visit https://git-scm.com/downloads.
5. Choose a Firmware Version
Some hardware configurations may require different versions of firmware.
For most trackers, using https://github.com/SlimeVR/SlimeVR-Tracker-ESP.git is fine.
For MPU+QMC5883L trackers, you need https://github.com/deiteris/SlimeVR-Tracker-ESP.git.
6. Clone the Firmware Project
Make sure you close any current projects you have open or open a new window before moving forward with these steps.
-
Click the Source Control button, click on Clone Repository and enter the link to the firmware version you chose in step 5.
If you installed git while Visual Studio Code was open you may have to close it and re-open it first.
-
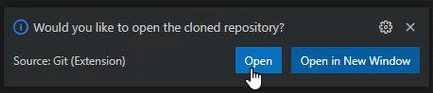
Once you have chosen a download location click the Open button that appears at the bottom right.
-
Click Yes, I trust the authors.

-
(MPU+QMC5883L only) Click the Source Control button, click on main and choose either qmc-mag-new or hmc-mag from the dropdown depending on whether you're using a QMC5883L or an HMC5883L.